
How to clean bike chain with tool is the fastest way to get rid of gritty shifting, chain noise, and that black paste that keeps reappearing on your fingers after every ride.
A dirty chain is not just cosmetic, it usually means extra friction, faster drivetrain wear, and a bike that never quite feels “smooth.” The good news is a chain-cleaning tool and a few basics can make the job predictable, less messy, and easier to repeat.
I’ll walk through what to use, when to clean, a realistic step-by-step process, and the small details that tend to separate a quiet drivetrain from one that still sounds rough after “cleaning.”
What “cleaning with a tool” really means (and why it works)
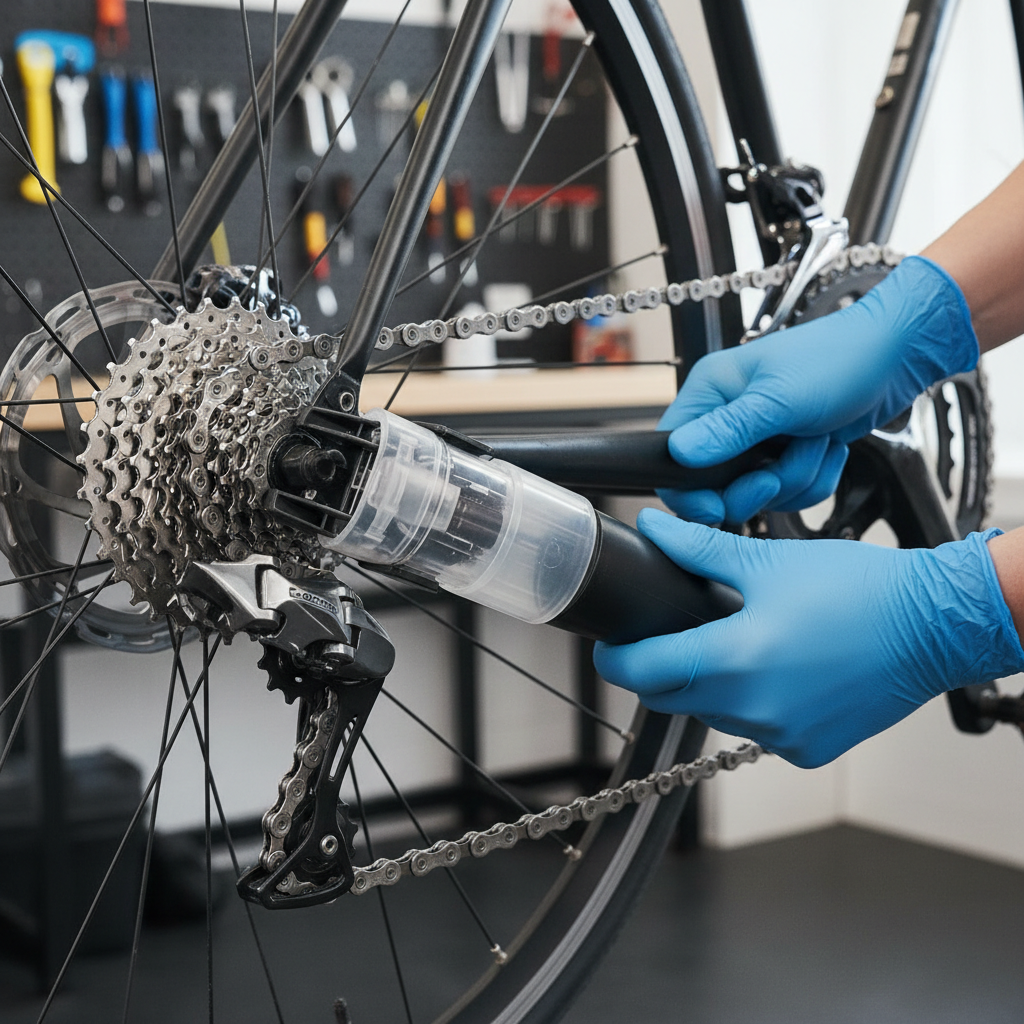
A chain-cleaning tool, often called a chain scrubber, is a small plastic box with rotating brushes. You fill it with degreaser, clamp it around the chain, then backpedal so the chain runs through the brushes.
This matters because it keeps the solvent where it’s useful, and it scrubs multiple sides of the chain at once. Compared with just wiping, it typically removes more grit from the outer plates and rollers, especially if you ride in rain, on dusty paths, or near sand.
One honest limitation: a scrubber cleans the outside and the accessible parts very well, but it does not magically “reset” a neglected drivetrain. If your cassette and chainrings are packed with hardened grime, you may need a deeper clean.
Tools and supplies checklist (pick the simplest setup that fits your riding)
You don’t need a full mechanic bench. You do need the right few items so you don’t end up re-contaminating the chain right after cleaning.
- Chain cleaning tool (chain scrubber)
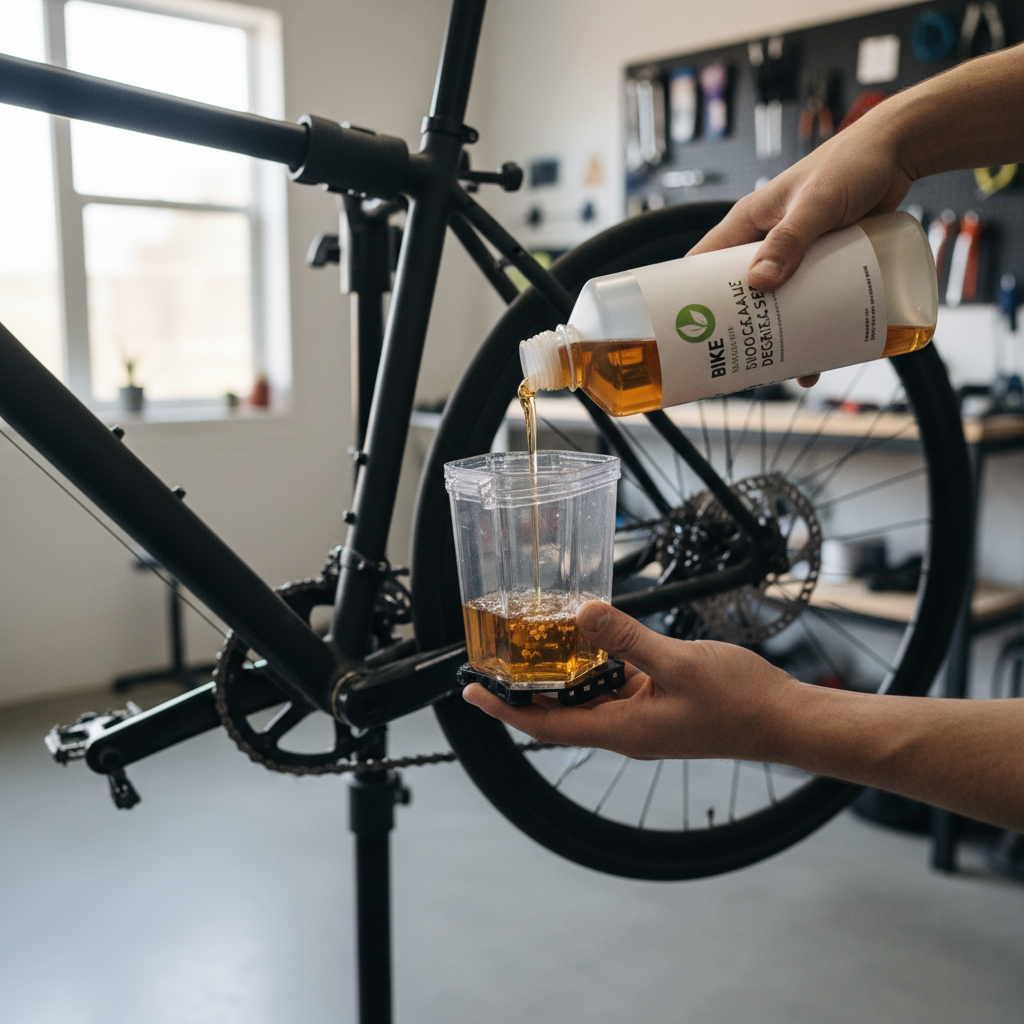
- Bike-safe degreaser (citrus or water-based is common; avoid harsh solvents on painted parts)
- Chain lube matched to conditions: wet lube for rain, dry lube for dust, wax-based if you prefer a cleaner drivetrain
- Two clean rags (one for dirty wipe, one for final wipe)
- Old toothbrush or detailing brush
- Nitrile gloves (optional but your hands will thank you)
- Drip tray or cardboard to protect the floor
According to Park Tool, using a dedicated bicycle degreaser and following up with proper lubrication helps prevent accelerated drivetrain wear after cleaning.
Quick self-check: do you need a light clean, or a full degrease?
This is where people waste time. If you clean too aggressively too often, you can strip lube constantly. If you wait too long, you grind paste into the drivetrain.
Light clean is usually enough if:
- Chain looks dusty but not sticky
- Shifting feels mostly normal, just a little “dry” sounding
- Rag wipe turns gray, not thick black
Full tool-based degrease makes sense if:
- Chain feels tacky and leaves black residue immediately
- You rode in rain, on salted winter roads, or through mud
- Backpedaling sounds gritty, even after a wipe
- There’s visible buildup on jockey wheels or cassette teeth
If you’re unsure, start with a lighter pass. You can always do a second round, but you can’t un-strip lube you already dissolved.
How to clean a bike chain with a tool: step-by-step (the “no drama” method)
This routine targets good results without turning chain cleaning into a full Saturday project.
1) Set up the bike and protect your space
- Shift to the small chainring and a middle rear cog, it keeps chain tension reasonable.
- Place a tray or cardboard under the drivetrain.
- Do a quick dry wipe to remove loose grit, this helps the degreaser last longer.
2) Fill and attach the chain scrubber
- Fill to the tool’s line with degreaser, don’t overfill.
- Clamp the tool on the lower chain run (between chainring and rear derailleur).
3) Backpedal slowly, then repeat with fresh solution if needed
- Backpedal 20–40 rotations at a steady pace, keep the tool level.
- If the fluid turns opaque black quickly, dump it and do a second round with fresh degreaser.
4) Remove the tool, then clean the “supporting cast”
- Wipe the chain thoroughly with a rag.
- Brush jockey wheels and the lower derailleur area, they often hold the worst grime.
- Wipe the cassette face and chainring teeth, especially the valleys between teeth.
5) Rinse or wipe, depending on degreaser type
Many degreasers are “rinse with water” products, others are “wipe clean.” Follow the label, because trapped degreaser can dilute lube. If you rinse, avoid blasting water into bearings and pivots.
6) Dry fully before lubrication
- Run a dry rag along the chain while backpedaling.
- If you rinsed, give it time to air dry, or use low-pressure air carefully.
That dry step is where the method usually succeeds or fails. If the chain is still wet with solvent, fresh lube won’t stick well.
Lubing after cleaning: the part that keeps it quiet
After you learn how to clean bike chain with tool, the next “secret” is that lubrication is not about making the chain look shiny, it’s about getting lubricant inside the rollers, then removing excess.
- Apply one small drop per roller while slowly backpedaling.
- Let it sit 5–15 minutes (longer is often better if the lube recommends it).
- Wipe off the outside thoroughly with a clean rag, the chain should look almost dry.
If the chain looks wet afterward, it will attract dirt quickly and you’ll be back to black paste sooner than you expect.
Common mistakes that make your chain dirty again fast
- Skipping the final wipe: excess lube on the outside is basically dirt glue.
- Using too aggressive a solvent: strong solvents can damage finishes and may affect some plastics, and they tend to strip everything quickly.
- Cleaning the chain but ignoring jockey wheels: grime there migrates back onto the chain.
- Rinsing with high-pressure water: it can push water into bearings, leading to corrosion or roughness later.
- Cleaning “by feel” only: if you always wait until it’s loud, you typically clean less often but work harder each time.
According to Shimano, correct lubrication and removing excess oil from the chain surface helps reduce dirt adhesion and supports smooth drivetrain performance.

Frequency guide and a simple table you can actually follow
Cleaning frequency depends on weather, road grit, and lube type. Here’s a practical baseline many riders use, then adjust based on how quickly your chain turns dark after a wipe.
| Riding conditions | Typical chain care | Tool-based clean |
|---|---|---|
| Dry roads, fair weather | Wipe and re-lube as needed | Every 2–6 weeks |
| Dusty paths or gravel | Wipe after most rides | Every 1–3 weeks |
| Rainy rides | Dry and re-lube soon after | After several wet rides |
| Mud, winter grit, road salt | Rinse gently, dry, re-lube | Often weekly, sometimes sooner |
Key point: if your chain “squeaks” within one ride of cleaning and lubing, something is off, usually drying time, lube choice, or you under-lubed the rollers.
When a chain tool isn’t enough (and when to ask a shop)
If you keep cleaning and the drivetrain still skips, grinds, or sounds harsh, the issue may be wear rather than dirt.
- Chain wear: a stretched chain can damage cassette teeth, a shop can measure it quickly with a chain checker.
- Rust or stiff links: surface rust sometimes cleans up, but seized links can be unsafe.
- Persistent skipping under load: can indicate worn cassette/chainrings or derailleur adjustment issues.
- E-bike or internal gear hub setups: may have manufacturer-specific guidance, checking the manual can prevent mistakes.
If you’re unsure, it’s reasonable to consult a local bike shop, especially if the bike makes noises only when pedaling hard or if shifting problems appear suddenly after cleaning.
Conclusion: a cleaner chain with less effort, not more
How to clean bike chain with tool comes down to three habits: scrub with fresh degreaser when needed, dry more than you think, then lube the rollers and wipe the outside almost dry. Do that consistently and most chains stay quieter, shift better, and feel less “draggy.”
If you want a simple next step, set a recurring reminder to do a quick wipe weekly, then schedule a tool-based clean based on your conditions table above.
Key takeaways
- Clean first, then lube, never the other way around.
- Drying time matters as much as degreasing.
- Wipe off excess lube to keep dirt from sticking.
- If problems persist, check wear before you keep scrubbing.
FAQ
How to clean bike chain with tool without removing the chain?
Clamp the chain scrubber on the lower chain run and backpedal. You can do a thorough clean without removing the chain, then wipe, dry, and re-lube.
Is it okay to use dish soap in a chain cleaning tool?
In many cases, dish soap cuts surface grime but struggles with oily buildup, and it can leave water behind that encourages rust if you don’t dry well. A bike-specific degreaser is usually more predictable.
Do I need to rinse after using a degreaser?
It depends on the product. Some are rinse-off, others are designed to be wiped away. Follow the label, and aim for a chain that feels clean and dry before lubricant goes on.
What if the degreaser turns black immediately?
Dump it and repeat with fresh solution. When the drivetrain is heavily contaminated, the first fill often becomes “dirty water” fast and stops cleaning effectively.
Can I pressure wash my chain after using the tool?
Not recommended in most home setups. High-pressure water can push moisture into bearings and pivots. A gentle rinse or careful wipe tends to be safer.
Why is my chain still noisy right after cleaning and lubing?
Common causes include solvent still on the chain, lube not reaching the rollers, or too much lube attracting grit. Wipe thoroughly, let lube soak in, and double-check that you applied drop-by-drop to the rollers.
How often should I do a tool-based chain clean?
Many riders land somewhere between every couple weeks and every couple months, depending on rain, dust, and mileage. Use the table as a starting point and adjust based on how dirty your rag gets during a wipe.
If you’re cleaning often and it still feels messy, you might prefer a lower-mess routine like wax-based lubrication or a shop service that includes cassette and pulley cleaning, it can be a more “set and forget” approach for some riding conditions.